使用GAS把dialogflow接在上面,實現智能回復
首先,在dialogflow建立實體
開始GAS檔
在 資源>>程式庫
串上兩個資源
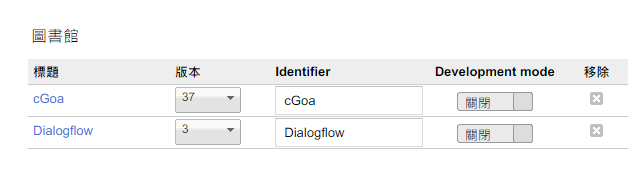
MZx5DzNPsYjVyZaR67xXJQai_d-phDA33 – cGoa
1G621Wm91ATQwuKtETmIr0H39UeqSXEBofL7m2AXwEkm3UypYmOuWKdCx – Dialogflow
在GAS上,貼上
function oneOffSetting() {
var file = DriveApp.getFilesByName('NAME_OF_YOUR_JSON_KEY_FILE.json').next();
// used by all using this script
var propertyStore = PropertiesService.getScriptProperties();
// service account for our Dialogflow agent
cGoa.GoaApp.setPackage (propertyStore ,
cGoa.GoaApp.createServiceAccount (DriveApp , {
packageName: 'dialogflow_serviceaccount',
fileId: file.getId(),
scopes : cGoa.GoaApp.scopesGoogleExpand (['cloud-platform']),
service:'google_service'
}));
}
接下來,先取得json檔
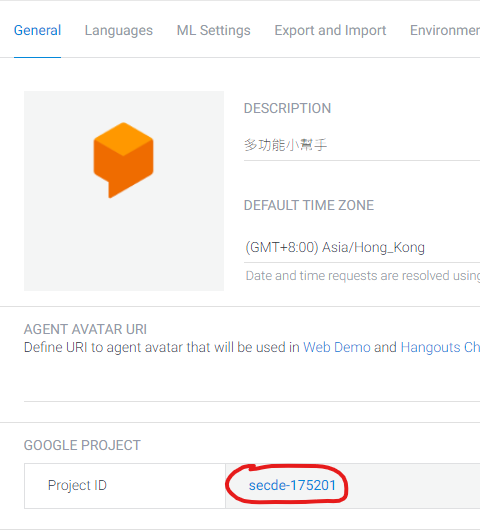
回到dialogflow,機器人的設定頁
點擊後進入(cloud.google需要開通)
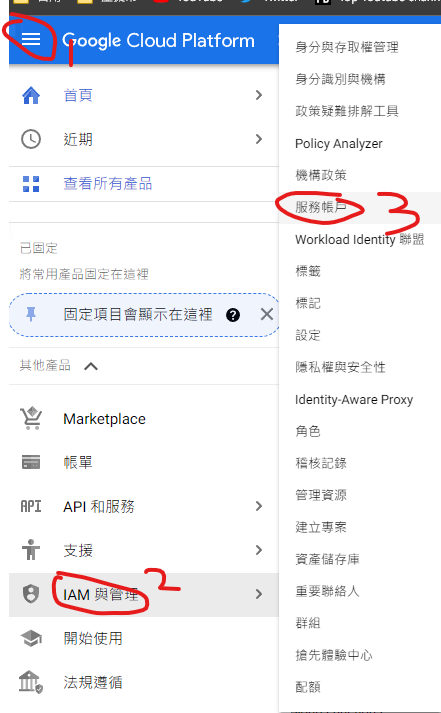
建立新帳戶

輸入帳戶名稱,點建立並繼續(不要完成)
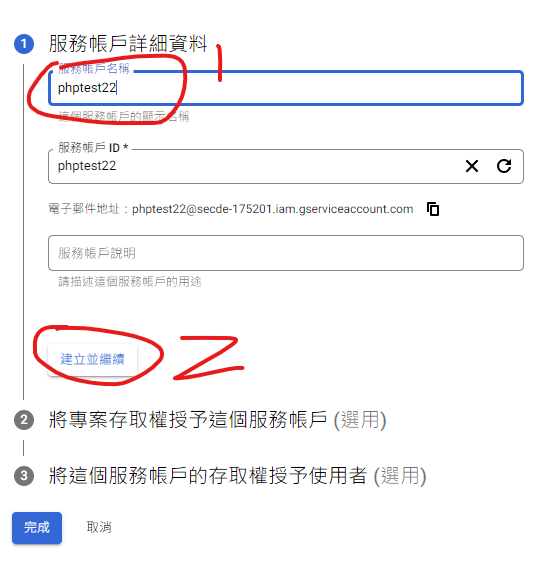
此處為重點!!一定要選 Dialogflow API管理員(用搜尋找,需要完全一樣,功能才能正常)
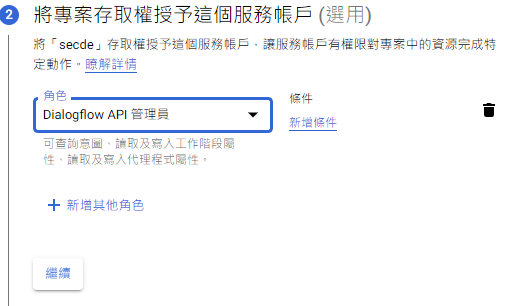
完成後繼續,完成建立
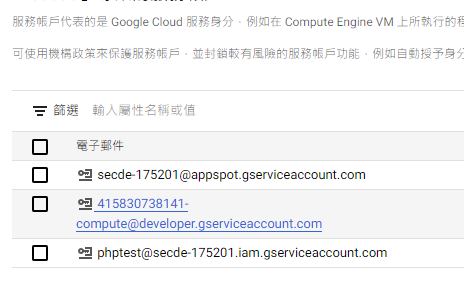
點擊剛剛建立的帳號
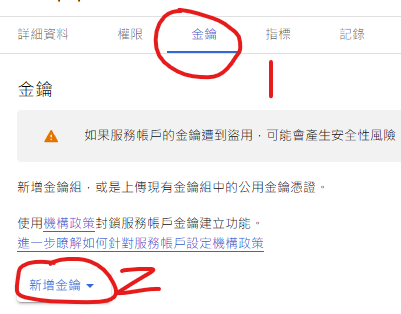
選 json
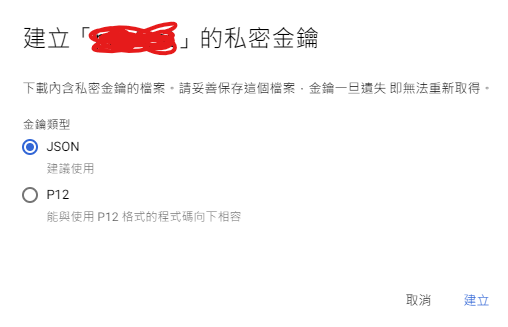
點建立後,自動下載一個json檔,放到google雲端上(別放到任一資料夾內)
接著修改剛剛的gas程式
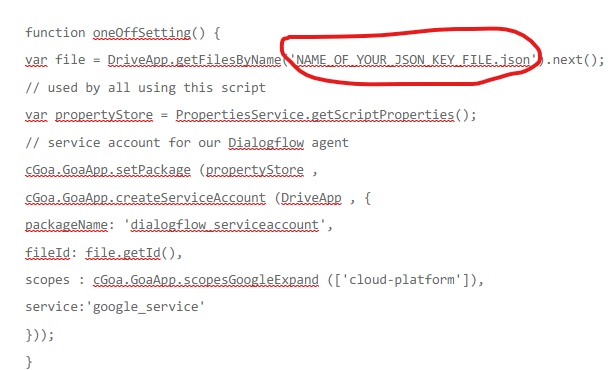
把圈起來的地方,放成下載的JSON檔,給程式讀取在google 雲端上的json檔
接下來執行oneOffSetting(),跑驗證
完成後,可以開始串功能,以下是設計者的程式
/**
* Detect message intent from Dialogflow Agent.
* @param {String} message to find intent
* @param {String} optLang optional language code
* @return {object} JSON-formatted response
*/
function detectMessageIntent(message, optLang){
// setting up calls to Dialogflow with Goa
var goa = cGoa.GoaApp.createGoa ('dialogflow_serviceaccount',
PropertiesService.getScriptProperties()).execute ();
if (!goa.hasToken()) {
throw 'something went wrong with goa - no token for calls';
}
// set our token
Dialogflow.setTokenService(function(){ return goa.getToken(); } );
/* Preparing the Dialogflow.projects.agent.sessions.detectIntent call
* https://cloud.google.com/dialogflow-enterprise/docs/reference/rest/v2/projects.agent.sessions/detectIntent
*
* Building a queryInput request object https://cloud.google.com/dialogflow-enterprise/docs/reference/rest/v2/projects.agent.sessions/detectIntent#QueryInput
* with a TextInput https://cloud.google.com/dialogflow-enterprise/docs/reference/rest/v2/projects.agent.sessions/detectIntent#textinput
*/
var requestResource = {
"queryInput": {
"text": {
"text": message,
"languageCode": optLang || "en"
}
},
"queryParams": {
"timeZone": Session.getScriptTimeZone() // using script timezone but you may want to handle as a user setting
}
};
/* Dialogflow.projectsAgentSessionsDetectIntent
* @param {string} session Required. The name of the session this query is sent to. Format:`projects//agent/sessions/`.
* up to the APIcaller to choose an appropriate session ID. It can be a random number orsome type of user identifier (preferably hashed)
* In this example I'm using for the
*/
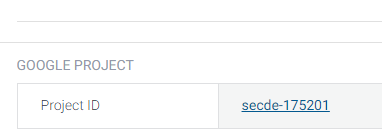
// your Dialogflow project ID
var PROJECT_ID = 'YOUR_DIALOGFLOW_PROJECT_ID'; // <- your Dialogflow proejct ID
// using an URI encoded ActiveUserKey (non identifiable) https://developers.google.com/apps-script/reference/base/session#getTemporaryActiveUserKey()
var SESSION_ID = encodeURIComponent(Session.getTemporaryActiveUserKey());
var session = 'projects/'+PROJECT_ID+'/agent/sessions/'+SESSION_ID; //
var options = {};
var intent = Dialogflow.projectsAgentSessionsDetectIntent(session, requestResource, options);
return intent;
}其中需要注意 var PROJECT_ID = ‘YOUR_DIALOGFLOW_PROJECT_ID’;
需要修改成 project ID
都修改完成後,就能開始使用了。
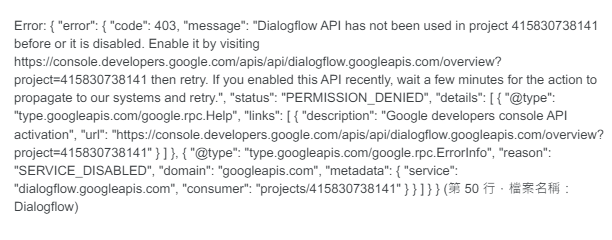
若出現以上內容,使用裡面的網址,去開通dialogflow